# Advanced Input Mapping

Input mapping is a critical step in customizing your Pilot Pro Radio for use with non-Freefly hardware. Whether you're piloting drones, RC planes, or other remote-controlled models, input mapping allows you to configure and assign channels, switches, and controls to suit your unique needs. The Pilot Pro Radio’s robust features make it easy to tailor inputs to your specific preferences, enhancing responsiveness and control precision. In this guide, we’ll explore the fundamentals of input mapping, walk through step-by-step instructions, and share tips for getting the most out of your setup. By the end, you’ll have the skills to unlock the full potential of your Pilot Pro Radio.

### Custom Configuration File

The custom configuration YAML file is your gateway to unparalleled flexibility and personalization with the Pilot Pro Radio. This powerful file format allows you to define and fine-tune every aspect of your radio’s setup, from channel assignments and switch functions to advanced input mappings and flight modes. By editing the YAML, you can create a tailored configuration that perfectly matches your flying style, equipment, and mission objectives. In this guide, we’ll introduce the structure and purpose of the YAML file, explain how to edit it safely, and provide tips for crafting configurations that elevate your piloting experience to the next level.\\

Below we have example configuration YAML's for our radios along with a blank variant for easy setup from scratch

Examples:

[Freefly Herelink](https://drive.google.com/file/d/1T-QVJwwEE2kOcZq3rT_xyKQYCIdfZ3ex/view?usp=sharing)

[Freefly Doodle](https://drive.google.com/file/d/1nPEz7ZK11yFMdh-wPybY-kH0hVwyoBA5/view?usp=sharing)

[Freefly RFD900](https://drive.google.com/file/d/1vTMtxqt01NLCtLuswKg2hN8fp7UPj91B/view?usp=sharing)

[Freefly Blank](https://drive.google.com/file/d/1b35dANp2zisv_JTK6sQlgFOdZyMN-PQJ/view?usp=sharing)

### General Configuration

The configuration file begins with general information needed to parse and label the configuration:

```
FORMAT_VERSION: 1
CONFIG_NAME: Freefly Herelink
```

<table data-header-hidden><thead><tr><th width="319"></th><th></th></tr></thead><tbody><tr><td>FORMAT_VERSION</td><td>This field indicates the file format version</td></tr><tr><td>CONFIG_NAME</td><td>Use this field to name your configuration. 16 characters max, alphanumeric and spaces</td></tr></tbody></table>

{% hint style="warning" %}
Important: Do not modify the FORMAT\_VERSION field unless instructed to do so.
{% endhint %}

### Parameter Configuration

The parameters define the base layer for communication with the module and some default settings.

```
PARAMETERS:
  RadioUartBaud: 57600
  SbusBaud: 100000
  SbusChDefaultVal: 1023
  VehicleCompId: 1
  VehicleSysId: 1
```

#### Parameter List:

| RadioUartBaud    | Baud rate for UART communication to the radio. Do not change     |
| ---------------- | ---------------------------------------------------------------- |
| SbusBaud         | Baud rate for the SBUS protocol. Do not change                   |
| SbusChDefaultVal | Default SBUS value when a SBUS channel is not mapped to an input |
| VehicleCompId    | MAVLink Vehicle Component ID                                     |
| VehicleSysId     | MAVLink Vehicle System ID                                        |

### Input Configuration

The INPUTS section defines all available inputs on your device. Each input has a value range of 1 to -1. Boolean inputs will be 1 when high/true, -1 when low/false. The input value will be scaled to the range defined in the output configuration. Each input type is grouped under its respective category, and the full list of available inputs are listed below:

```
INPUTS:
  - JOYSTICK_INPUT:
      - name: Joystick_Left_X
        smoothFactor: 0.0
        window: 1.0
        expoFactor: 0.0
```

#### Input Types:

<table data-header-hidden><thead><tr><th width="347"></th><th></th></tr></thead><tbody><tr><td>JOYSTICK_INPUT</td><td><p>Joystick_Left_X<br>Joystick_Left_Y</p><p>Joystick_Right_X</p><p>Joystick_Right_Y</p></td></tr><tr><td>ROCKER_INPUT</td><td><p>Rocker_Left</p><p>Rocker_Right</p></td></tr><tr><td>DIAL_INPUT</td><td><p>Dial_1</p><p>Dial_2</p><p>Dial_3</p><p>Dial_4</p></td></tr><tr><td>BUTTON_INPUT</td><td><p>Button_A1</p><p>Button_A2</p><p>Button_A3</p><p>Button_A4</p><p>Button_A5</p><p>Button_L1</p><p>Button_L2</p><p>Button_Power</p><p>Button_R1</p><p>Button_R2</p></td></tr><tr><td>SWITCH_INPUT</td><td><p>Switch_Kill</p><p>Switch_S1 (Up, Center, Down, as 1, 0, -1)</p><p>Switch_S1_Center (Boolean, is or is not Center)</p><p>Switch_S1_Down (Boolean, is or is not Down)</p><p>Switch_S1_Up (Boolean, is or is not Up)</p><p>Switch_S2 (Up, Center, Down, as 1, 0, -1)</p><p>Switch_S2_Center (Boolean, is or is not Center)</p><p>Switch_S2_Down (Boolean, is or is not Down)</p><p>Switch_S2_Up (Boolean, is or is not Up)</p></td></tr></tbody></table>

For each analog input, there are a variety of settings that can be configured.

#### Analog Input Settings:

| name         | The unique name of the input used for the ‘inputName’ field of an output. DO NOT MODIFY.                                                                                       |
| ------------ | ------------------------------------------------------------------------------------------------------------------------------------------------------------------------------ |
| smoothFactor | The amount of smoothing applied. Higher values create smoother but more delayed responses. The range is 0.0 (no smoothing) to 100.0 (maximum smoothing).                       |
| window       | The amount of deadband applied. This creates a window where the input is ignored near center stick to eliminate drift. The range is 0.0 (no window) to 100.0 (maximum window). |
| expoFactor   | The amount of expo applied to your stick commands. Set to a value of 0.0 for a linear response. The range is -100.0 (center stick sensitive) to 100.0 (outer stick sensitive). |

{% hint style="warning" %}
Important: Do not remove any fields from this section. If an input is not used, leave its fields as they are in the Input section
{% endhint %}

### Output Configuration

The OUTPUTS section defines how inputs are mapped to various output types. Each output type has its own subsection which will apply to it’s respective type of commands it can send:

```
OUTPUTS:
  - HID_OUTPUT:
      - name: HID_Button_1
        inputName: Button_A3
        scalarName: None
        ADCTh: -1
        minValue: 0.0
        maxValue: 1.0
```

#### Output Types:

| HID\_OUTPUT                      | Human Interface Device. Commonly used for connections to USB devices                                                                    |
| -------------------------------- | --------------------------------------------------------------------------------------------------------------------------------------- |
| SBUS\_OUTPUT                     | SBUS output. Used often with RC control                                                                                                 |
| SCALAR\_OUTPUT                   | Internal use. These are internal references that you need to adjust to change scaling, or have one input change the behavior of another |
| MAVLINK\_COMMAND\_OUTPUT         | MAVLink commands. Sends direct MAVLink message                                                                                          |
| MAVLINK\_MANUAL\_CONTROL\_OUTPUT | MAVLink MANUAL\_CONTROL. Used for MAVLink control system inputs                                                                         |
| MAVLINK\_MODE\_SWITCH\_OUTPUT    | Switch PX4 mode using the MAV\_CMD\_DO\_SET\_MODE MAVLink COMMAND\_LONG. Used for PX4 Autopilot.                                        |

For each output, you will have a combination settings that can be adjusted.

#### Output Settings:

| name       | Do not modify this. This is an internal name used to reference this part of the configuration                                                            |
| ---------- | -------------------------------------------------------------------------------------------------------------------------------------------------------- |
| inputName  | The name of the input you would like to apply to this output (ie to use the A1 button, you would put in Button\_A1. Input names can be referenced above) |
| scalarName | A scalar name to scale the output value with                                                                                                             |
| ADCTh      | An integer from 0 and 100 sets the threshold for the analog value to be converted to a digital value. Set to -1 if unused                                |
| minValue   | The minimum value of the output                                                                                                                          |
| maxValue   | The maximum value of the output                                                                                                                          |

{% hint style="warning" %}
Important: Do not remove any fields from this section. If an input is not used, put ‘None’ in the inputName
{% endhint %}

### Mapping Inputs to Outputs

To map an input to an output:

1. Find the desired output in the OUTPUTS section.
2. Set the inputName to the exact name of the input you want to map.
3. Adjust minValue and maxValue to set the range of the output if needed.

{% hint style="warning" %}
Remember: You can modify all output fields EXCEPT for the ‘name’ field
{% endhint %}

### Using Scalar Outputs

Scalar outputs can be used to modify input values that are mapped to an input. Scalar outputs follow the same output settings as all other outputs, but give an additional point to modify the output

```
  - SCALAR_OUTPUT:
      - name: Scalar_1
        inputName: Dial_1
        scalarName: None
        ADCTh: -1
        minValue: 0.0
        maxValue: 1.0
```

### Pilot Pro Input Mapping Processing

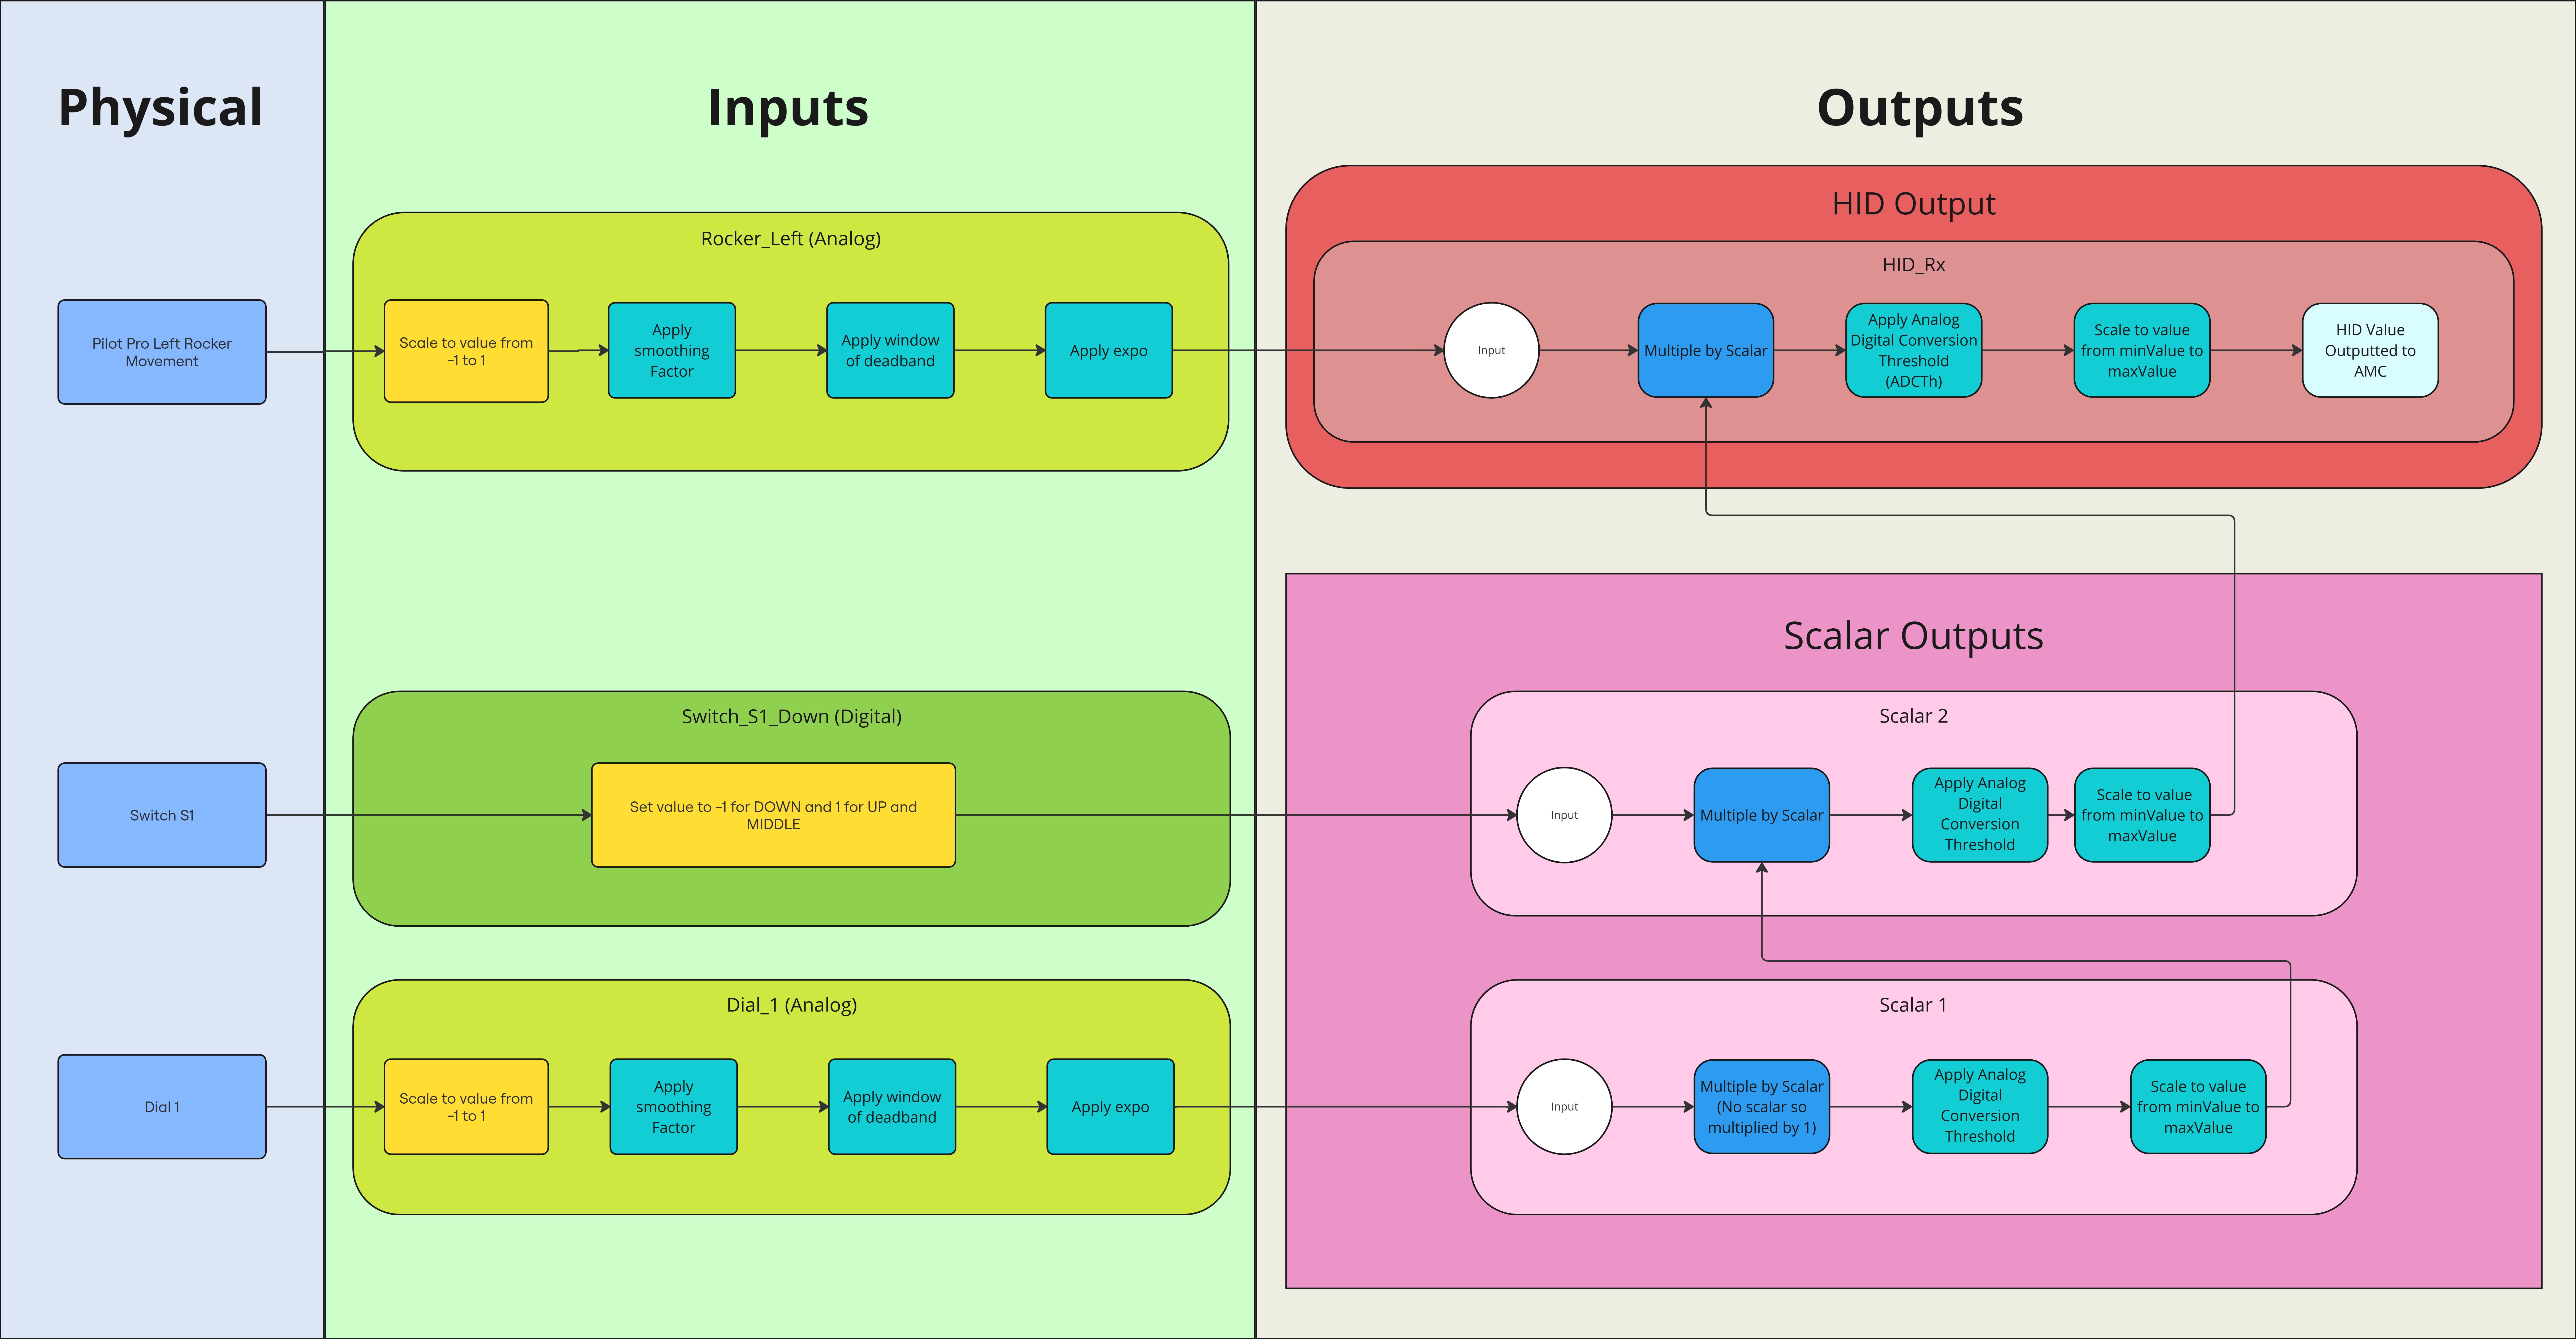
To assist with custom configurations, below is a flowchart of how inputs are processed into a usable output. This chart shows how we have mapped the left rocker by default. The rocker is both scaled by dial 1, and uses switch s1 to invert the direction it moves the gimbal.

<figure><img src="/files/Nil4kArlDhARVWN5vRkH" alt=""><figcaption><p>Internal Processing flow for Input Mapping on the Pilot Pro</p></figcaption></figure>

You can find a [high resolution version the flowchart here](https://drive.google.com/file/d/1TSngVhwGSXURSYwagDPfcCjGEGdZlIx8/view?usp=drive_link)

### Importing / Exporting Configurations

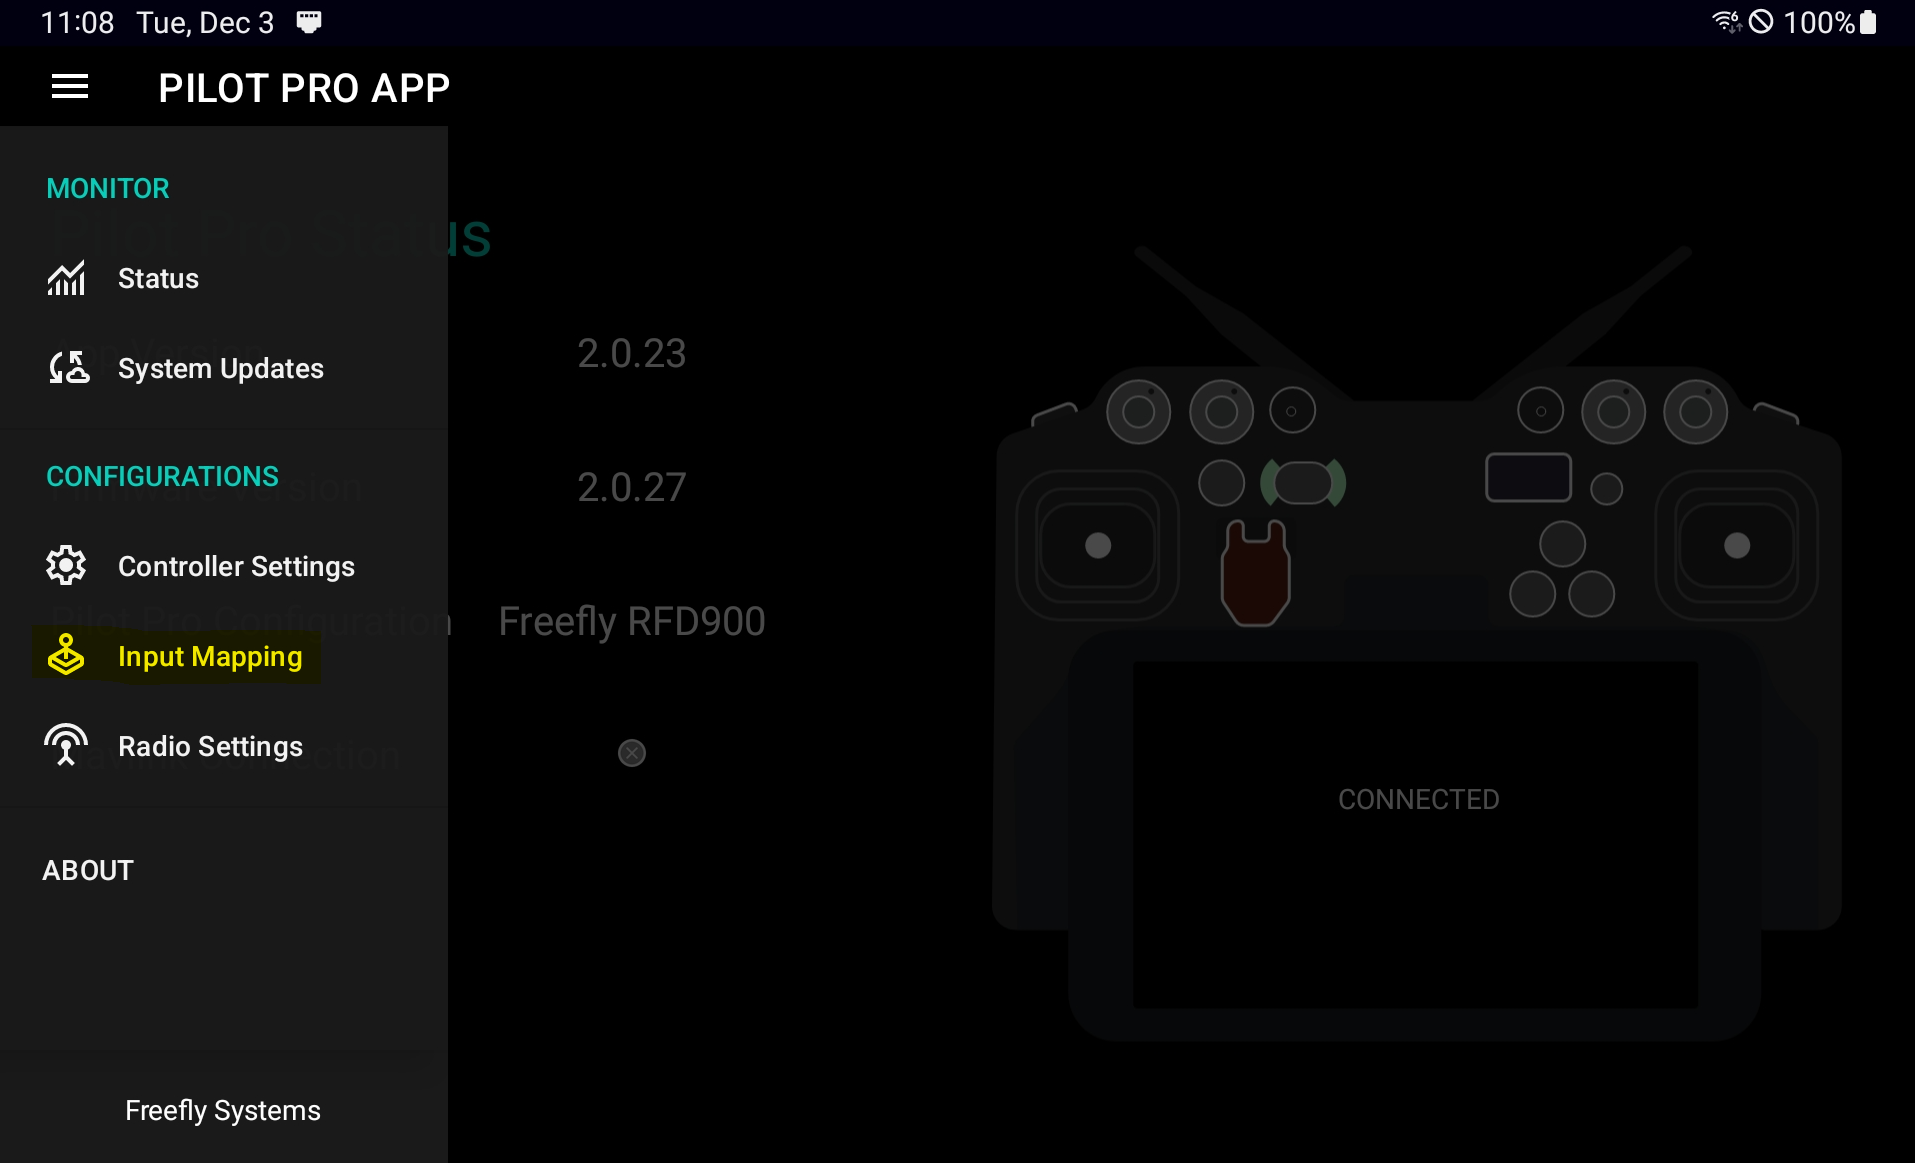
Configurations can be imported or exported through the Pilot Pro app's Input Mapping page

<figure><img src="/files/TfuBLSdF0VSTm2h8AhFl" alt=""><figcaption><p>Pilot Pro Input Mapping</p></figcaption></figure>

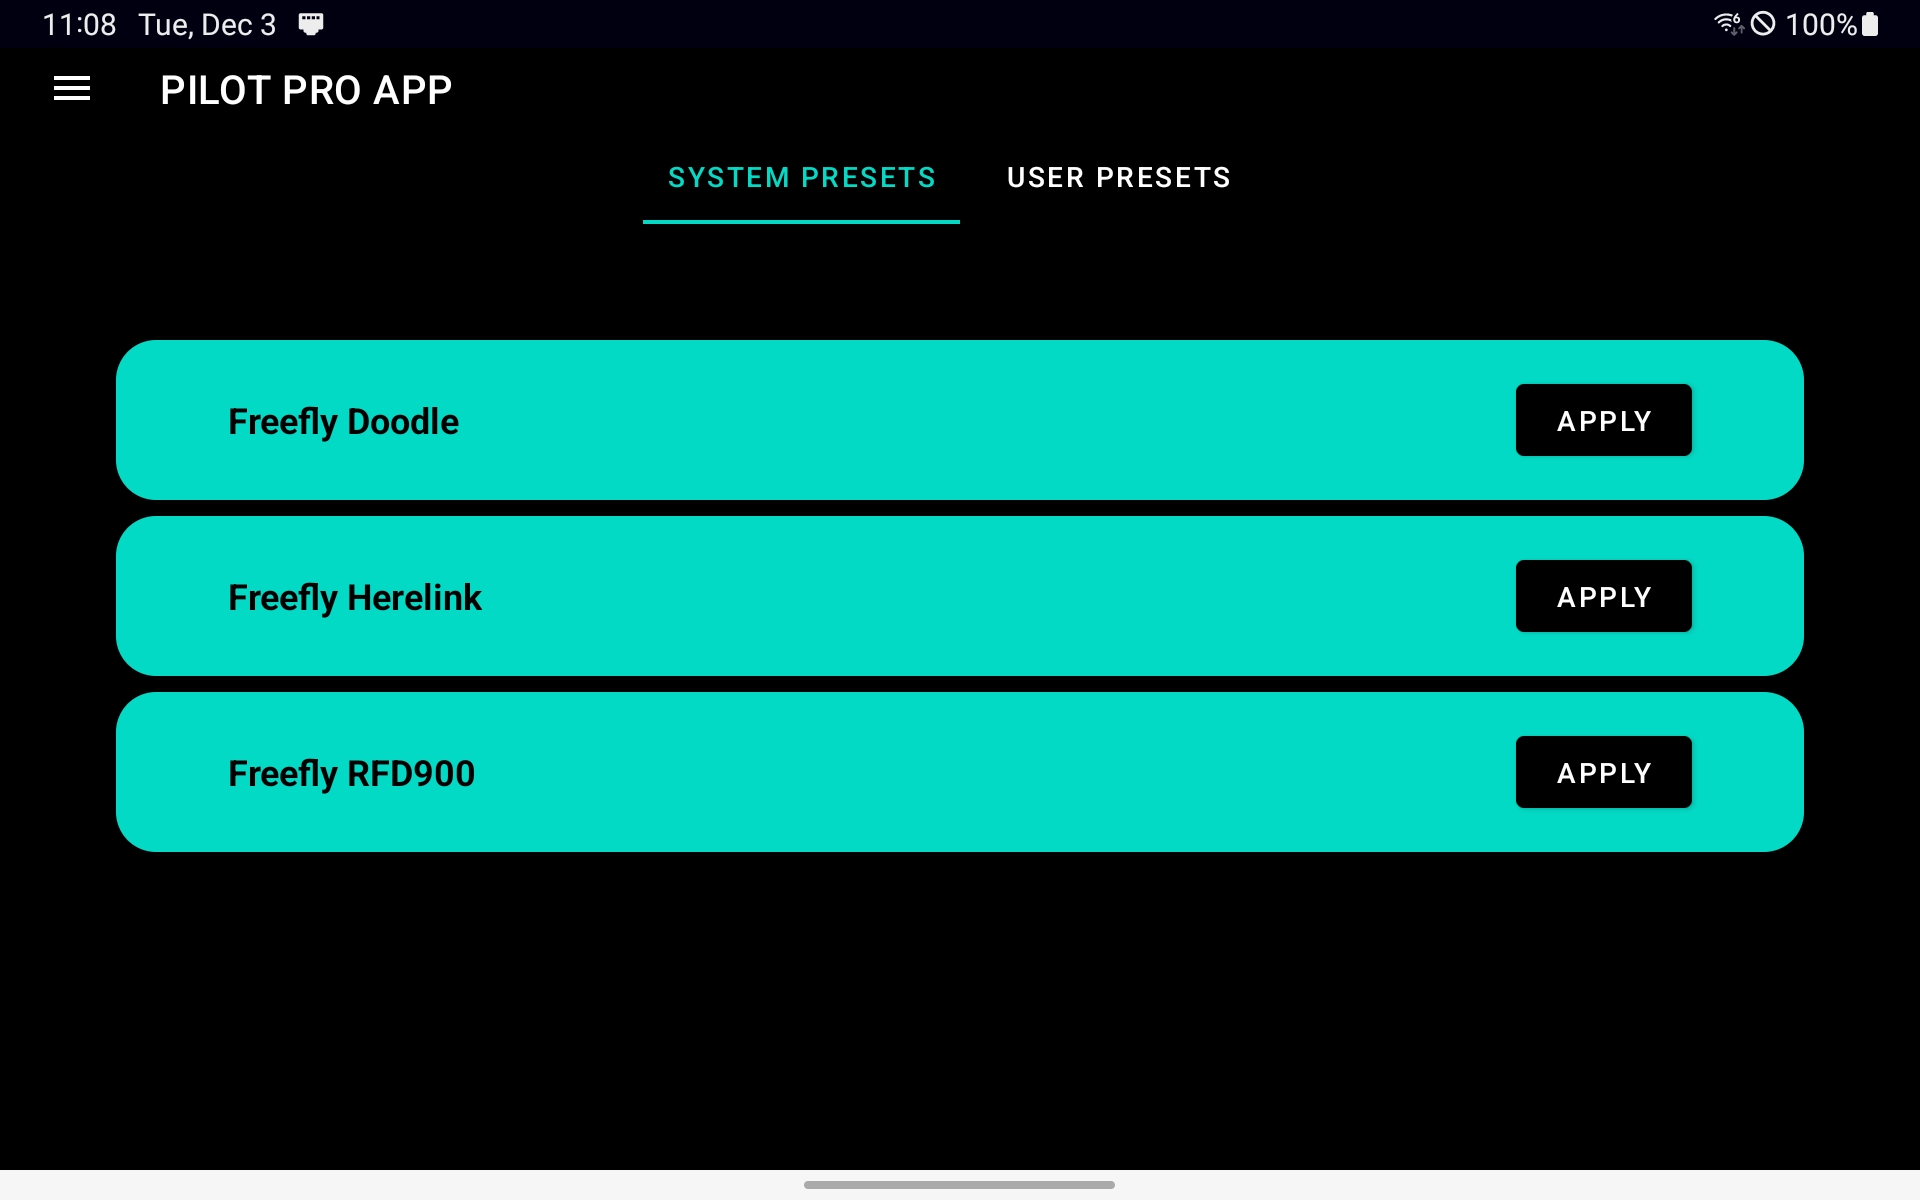
In System Presets, this will include all Freefly Preset configurations:

<figure><img src="/files/GIE0O00iZjXgUjA2C8j0" alt=""><figcaption><p>Freefly Default Presets</p></figcaption></figure>

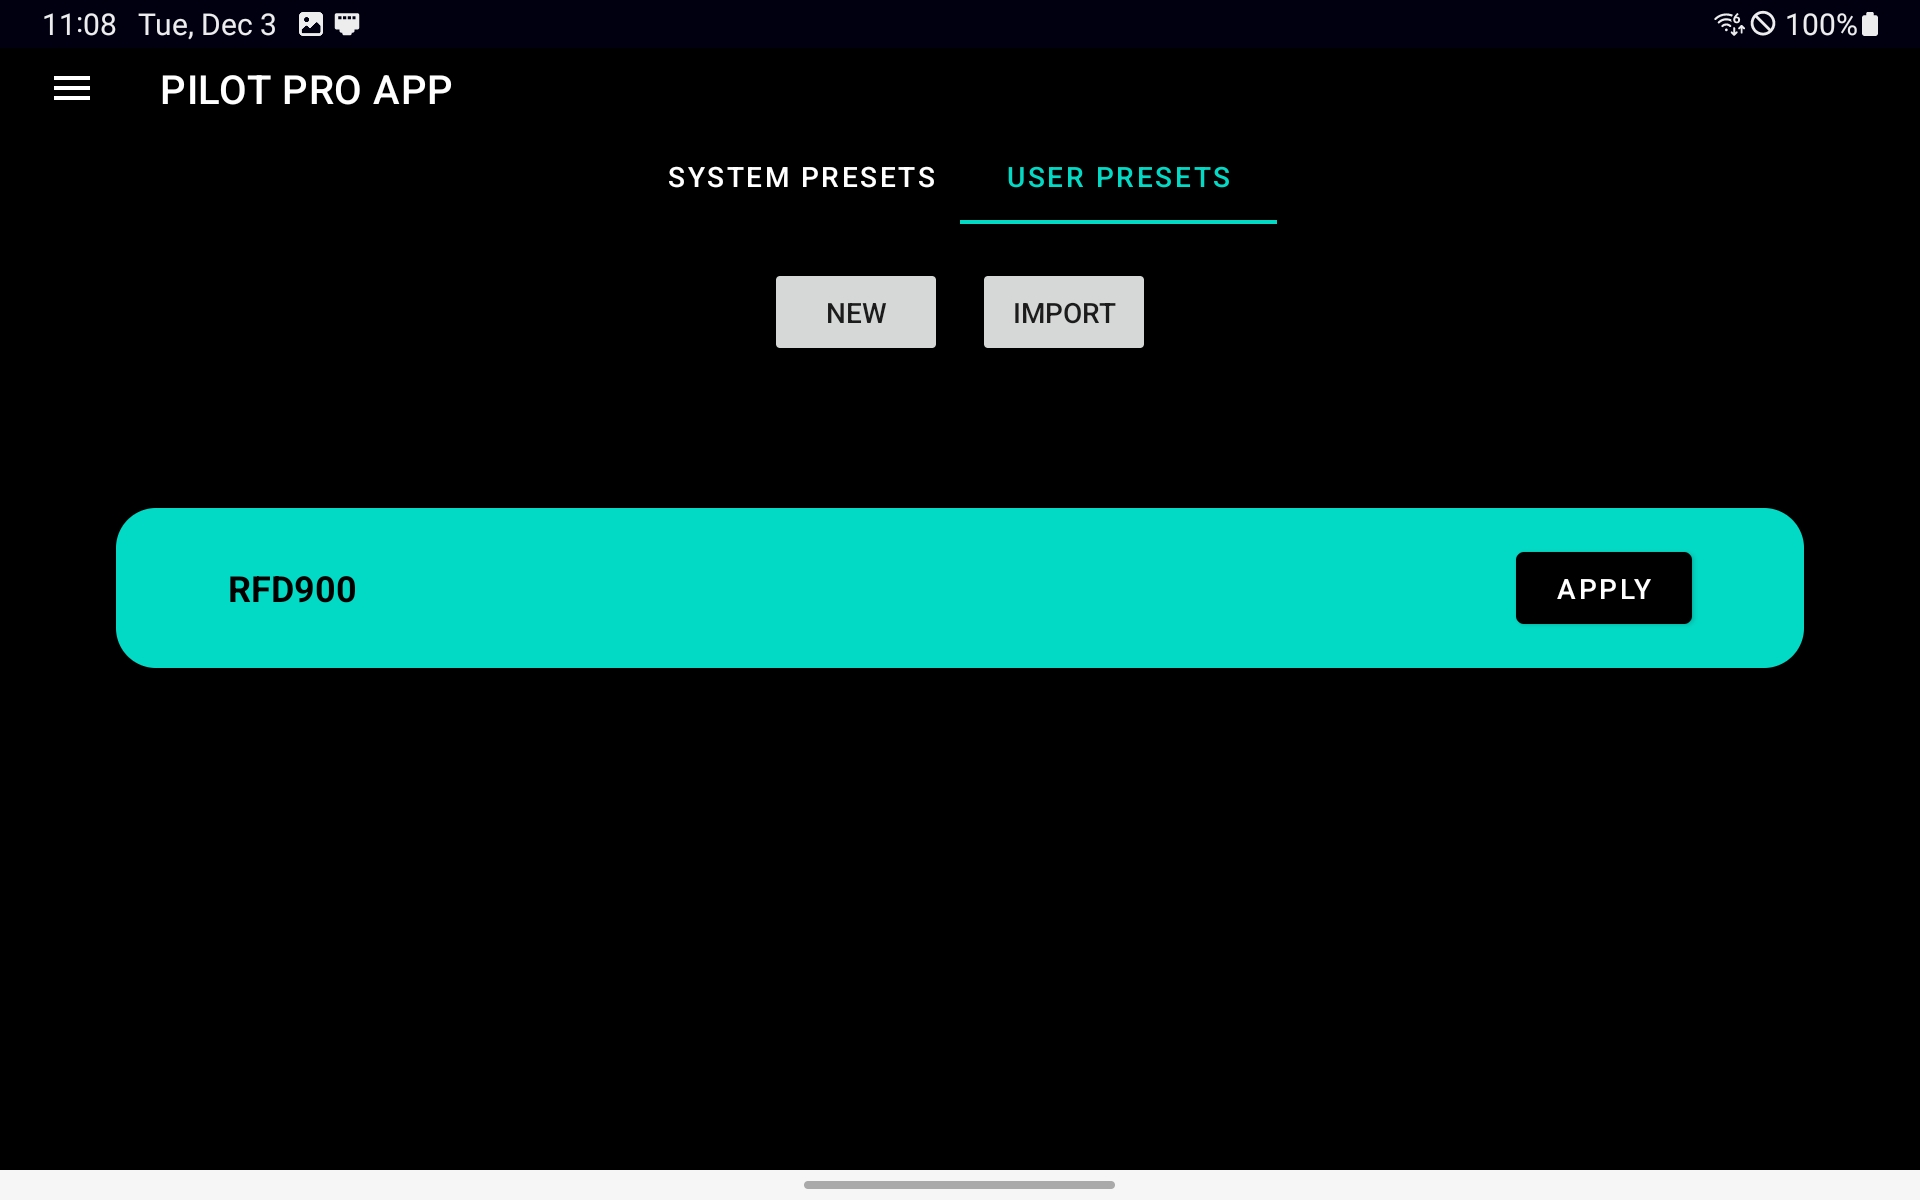
Under the User Presets, this will be where you can add or create your own configurations. Creating a New configuration will make a copy of your current configuration. Importing a configuration allows you to import a YAML configuration file from anywhere on your device. Importing will copy the configuration to Tablet Storage > Documents > Pilot Pro App > CONFIGURATION PRESETS. To remove a configuration, delete the YAML file from this location

<figure><img src="/files/11aTHL5gc9qVqH7xpiJi" alt=""><figcaption><p>Pilot Pro User Presets</p></figcaption></figure>


---

# Agent Instructions: Querying This Documentation

If you need additional information that is not directly available in this page, you can query the documentation dynamically by asking a question.

Perform an HTTP GET request on the current page URL with the `ask` query parameter:

```
GET https://docs.freeflysystems.com/ecosystem/controller/pilot-pro/operating-handbook/input-output-mapping/advanced-input-mapping.md?ask=<question>
```

The question should be specific, self-contained, and written in natural language.
The response will contain a direct answer to the question and relevant excerpts and sources from the documentation.

Use this mechanism when the answer is not explicitly present in the current page, you need clarification or additional context, or you want to retrieve related documentation sections.